In this article we are going to discuss:
- How to Format an External Hard Drive for Mac?
- How to Partition an External Hard Drive?
- Why is Hard Drive partition needed?
As we know that most of the hard drives available are designed to work for Windows computer. If you want to connect an external hard drive to Mac, you will need to format the drive. Now, let's see how to Format a Hard Drive for Mac.
How to Format an External Hard Drive for Mac?
First, make sure to backup all the data and files if you already used hard drive on your PC. All your files will wipe out on Formatting hard drive.
1. Connect your external hard drive on Mac.
Connect your external hard drive on Mac as some drives need to be plugged into an outlet to operate.
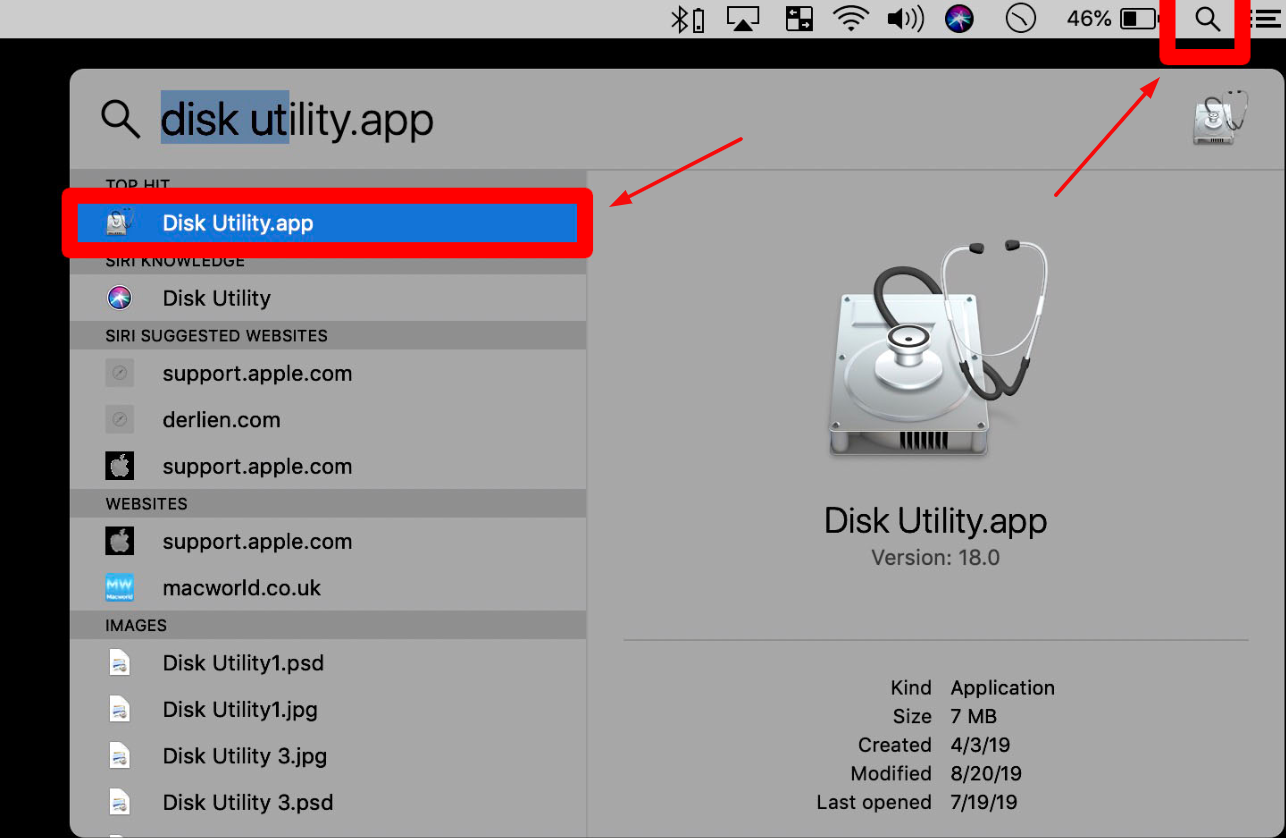
2. Type Disk Utility in Spotlight search and select the first option.
This action opens a Disk Utility app which shows lists of all the internal and external drives that are connected to your Mac.
 Source: hellotech.com
3. Select " Show All Devices" by clicking View in the top left corner of the window
 Source: hellotech.com
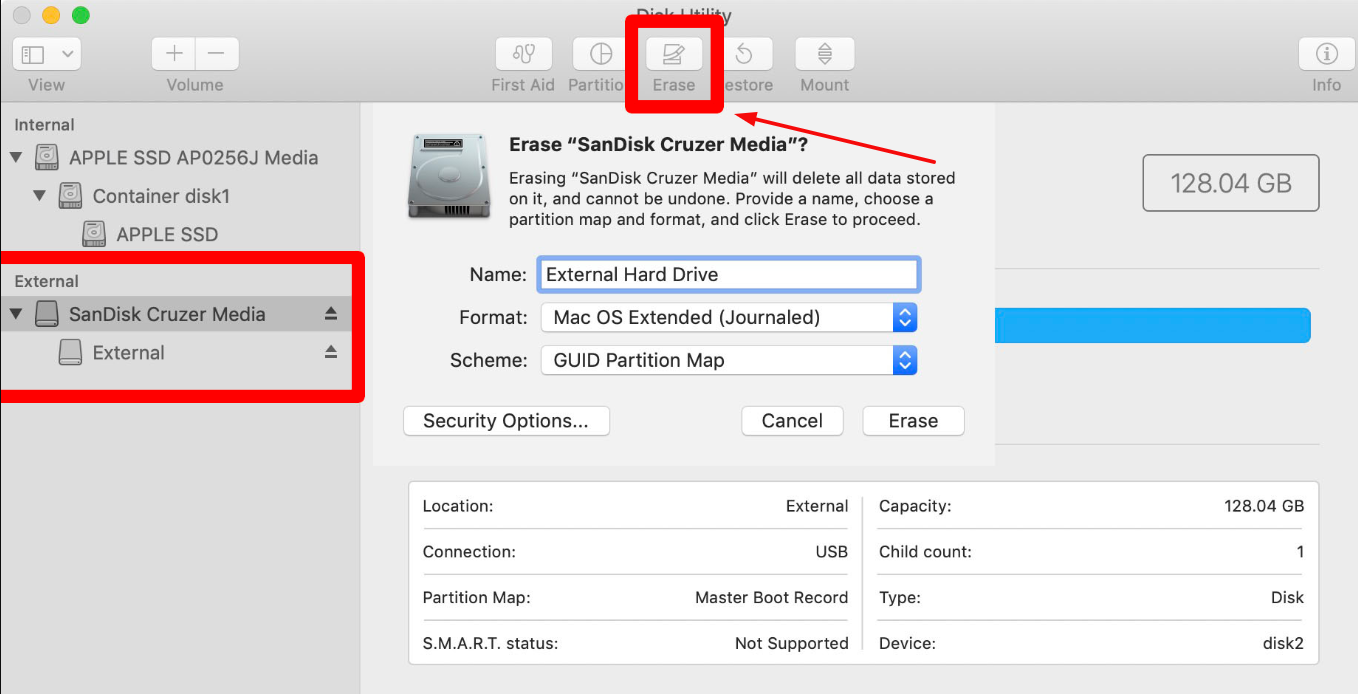
4. Choose the external hard drive to be formatted.
This option can be found to the left-hand side of the screen under " External Hard Drives". Select the disk with the highest option in the external tree for best results.
5. Click " Erase" on the top menu
A small pop-up window will be opened which says " Erasing the drive will delete all data stored on it and it can't be undone".
6. Select Name, Format and Scheme
You can fill anything in the Name section and choose GUID Partition Map for a scheme in most of the cases. For formats choose which is suitable for you from the option below
• Mac OS Extended ( Journaled)
This is one of the best options for Mac users as it is compatible with all Macs.
• APFS ( Apple File System)
This format is for an only newer version of Mac running macOS 10.13 or later.
• MS-DOS ( FAT)
This format is compatible for both Mac and PC but allows you to transfer files less than 4GB.
• exFAT
This format is compatible with both Mac and PC.
7. Finally, click " Erase"
After finishing the setup process, click "Erase" which will immediately wipe your entire drive. Do not freak if you get an error message that says " Erase process has failed. Click done to continue". It is due to Time Machine running on your external hard drive.
 Source: hellotech.com
Now, you will have to turn off Time Machine. To do this go to " Opening System Preferences" and uncheck the box next to " Back Up Automatically". Click " Options" beside Show Time Machine in the menu bar and click Cancel from another window. This action will turn off the Time Machine.
Repeat step 4 and 6 after turning off your Time Machine.
How to partition an external hard drive on Mac?
You can partition your drive once you have formatted it. This action will split the drive into two formats which are perfect for anyone who uses both PC and Mac for transferring files. It is a simple process and here is how you can format your external drive on Mac.
1. Go to Disk Utility
Open Disk Utility and choose the drive to be partitioned. Go to View>> Show All Devices and choose the device.
 Source: hellotech.com
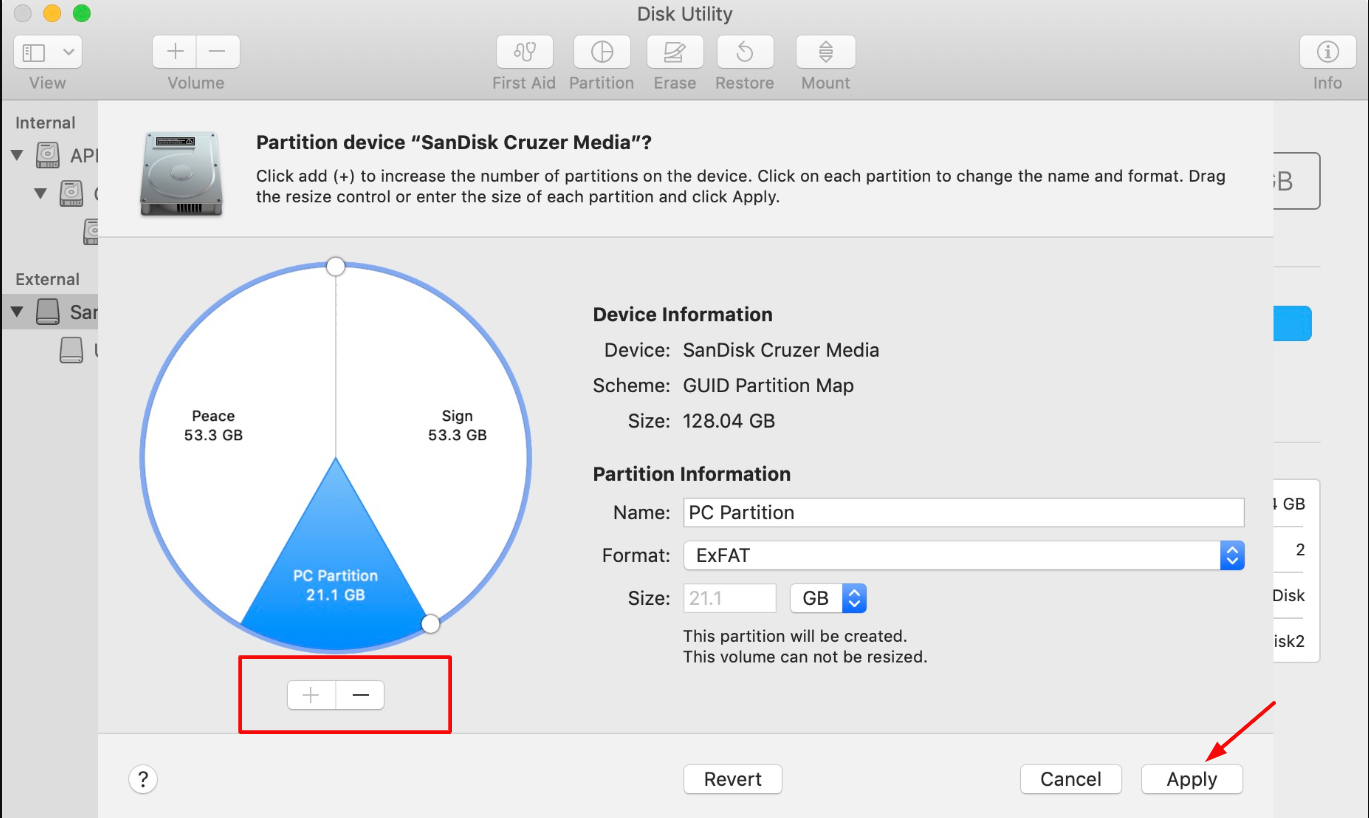
2. Select partition in the top menu
3. At the bottom of the pie chart, click plus sign to create a new partition.
4. Choose Name, Format and Size
You can select Name, Format and Size for each partition by white dots at the edge of the circle.
5. Click " Apply" and you are done.
 Source: hellotech.com
Why is Hard Drive partition needed?
Partition allows you to have separate drives for PC, Mac or any other operating system. You will not require to go out and buy external hard drives for every computer you use.
Partition offers dedicated space for Time Machine back-up files and also a bootable backup of the operating system. Other section of your drive won't get infected even if anyone partition gets infected by malware.



Readers Comment